A few years ago, Ferny surprised me with a handmade Plasma Bomber tree ornament. I’m a huge fan of Bomberman, and Plasma Bomber is one of my favourite characters. Last December, we decided to round out the rest of the gang together. We were going to post a tutorial to inspire other Bomberman fans back then, but time slipped by and so here we are.
In this tutorial, we’ll be showing you how to make simple ornaments of the 5 Fiendish Bombers (a.k.a. 5 Bad Bombers or 5 Dastardly Bombers), but you can of course make any character you want. If you go through with it, please tweet us a picture and share it with the world! It’s the season of giving or some such bullocks, so… let’s give Bomberman some love.
1. Supplies
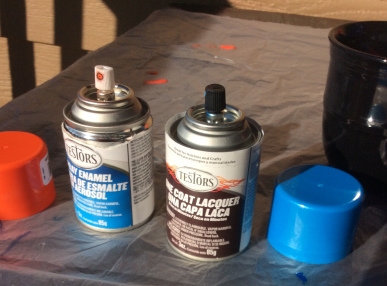
Spray paint: the kind of paint that can be sprayed.
You will need:
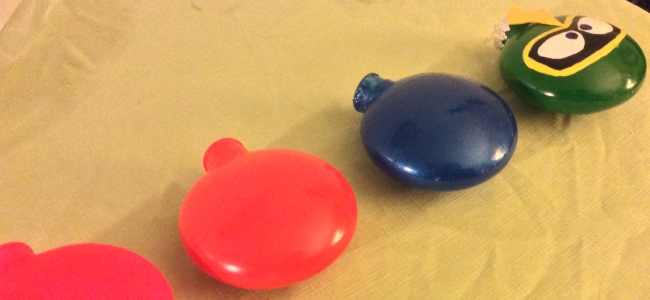
- Plastic disc ornaments, as many as you want. This is the shape we used. They’re like what you’d get if you took a spherical bulb and smushed it in, giving you more of a circular shape (flatter). Bigger is better – it’s easier to sort out the details.
- Spray paint. This will be used for the head colour.
- Basic acrylic paint and small paintbrushes. These will be used for the details. Fine-tipped paintbrushes are recommended for control.
- A pencil for sketching outlines.
- Non-corrugated cardboard, also known as mounting board. You only need this if your character has a forehead emblem, an eyepiece, or some other detail that you want to stand out. Non-corrugated cardboard is not like the stuff you see on most boxes; it looks flat, like really thick, sturdy paper. You can typically get it at crafts stores, though you might have to order it online. In a pinch, look for anything flat, sturdy, and easily cuttable.
- Scissors.
- A plastic cover to protect stuff from spray paint. Trash bags can work.
- A heavy cup and something sturdy, like a short dowel rod, butter knife, etc. You will be spray painting around these things, so please be aware of that before you choose your favourite coffee mug.
- Elmer’s glue or an equivalent. You only need this if you have complex cardboard pieces that have multiple layers, like Golem Bomber’s two-tone emblem or Brain Bomber’s eyepiece.
- Super glue. You only need this if you’re using cardboard.
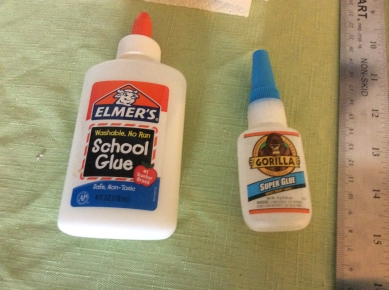
Glue: the kind of glue that can be… er, well, it’s glue.
2. Paint the head
First, place a bulb upside down onto your stick (we used butter knives), and place that into your cup. This should be enough to hold it in place and allow you to spray paint it at all angles. Your next step is to spray paint it at all angles.
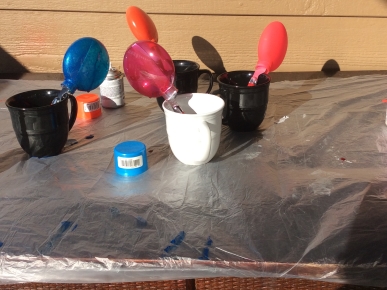
A quirky alternative to those little umbrellas.
Depending on what kind of spray paint you’re using, it may take more than one coat. The stuff we used for Magnet Bomber’s blue and Brain Bomber’s purple was different from normal opaque spray paint. The purple actually took a lot of coats, and then we ended up just switching to a different spray paint. It wasn’t that near-magenta that we wanted (like Brain Bomber’s original colour in Super Bomberman 2), but at least it wasn’t translucent. You can see what I mean in the picture above.
Now you have to let the paint dry. The waiting is the hardest part. Every day, you see one more card. If it takes multiple days for the spray paint to dry, though, I think you’re doing something wrong.
3. Paint the face
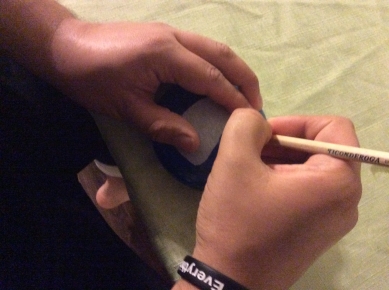
Ferny tracing a visor outline on Magnet Bomber.
Using your pencil, draw a light outline for the character’s face on one side of the bulb. If you’d like, you can draw the face on a separate piece of paper, then cut it out and trace its outline onto the bulb. Whichever way you choose, it’s probably best to do this in short, steady strokes to avoid mistakes, since it’s a big, curved, painted surface and most people aren’t accustomed to drawing on something like that. I know I’m not. But don’t worry too much if you mess up, since you can correct it later.
Once the graphite has dried (heh), select a paintbrush and fill in the outline with the appropriate paint colour for the face. You can see that we used a variety of colours for our ornaments. Plasma and Magnet have black, and Pretty has a light skin tone. We gave Brain and Golem different shades of grey, referencing various in-game and booklet artwork. It kind of makes them stand apart from each other more.
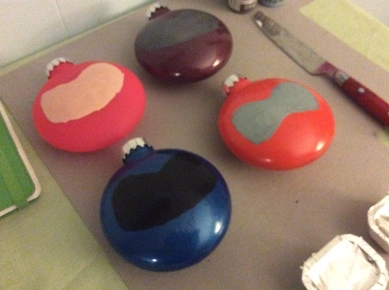
Just the base colour layer is applied on each of these.
Let the paint dry, then use your pencil to draw on details, such as eyes and the visor rim. Then, paint them in. The visor rim (line of colour around the face) should probably be the last thing to be painted on, unless you have something that you want to stick out over the visor, such as fangs (Bompire, for those kinds of people). You’ll want the visor rim to be pretty thick so it’s visible from afar, and this can also help you correct any problems you have with the face shape if you paint over any parts that may stick out too much.
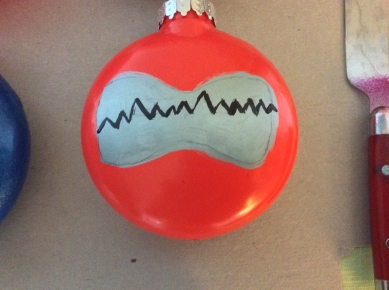
Golem Bomber with his visor display drawn in.
Once again, please let the paint dry before adding further details (such as pupils) and before proceeding to the next step.
If you’re making a character who needs no add-on parts, like an ordinary Bomberman, congratulations! You’re done! Otherwise, please continue…
4. Cut out the add-ons
We forgot to take a picture of this step, but you’ll see them in the next step, and it’s pretty straightforward. Sketch out your add-on parts, like the Fiendish Bombers’ forehead emblems, onto your mounting board, and then cut them out. Don’t be afraid to make them too big, because then you can just hold them up to the matching bulbs and cut them down if they’re not the right size. You can’t fix them if they start out too small.
For Golem Bomber’s emblem, since it has that red dot on it, we cut out a separate piece for that. It’s not strictly necessary, but it gives it some dimension, and also affords more control over the shape of the circle (I can’t claim to be a terrific painter). We also cut out multiple pieces for Brain Bomber’s eyepiece. That could have been painted onto the bulb, but creating it in this way gives it a nice 3D look. For further depth, his lens is a circle with a smaller circle on top of it. This can all be seen in a picture of him at the end of the article.
5. Paint the add-ons
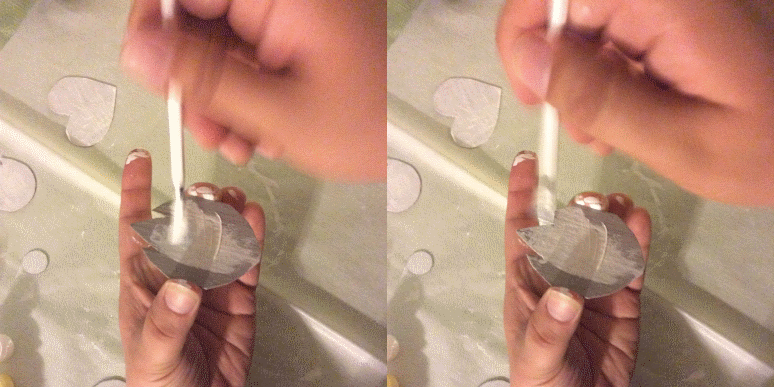
Painting, as demonstrated in two glorious frames of animation.
These pieces tend to be monochrome, so painting them is straightforward. We do have one recommendation, though. If you want to make something shine, like the golden emblems, you can paint a layer of white, then paint a layer of the proper colour (e.g. yellow), and then lightly add some white over the top of it, letting everything dry in between layers. This adds a subtle “shine” effect. Alternatively, you could just paint cartoonish shine lines on top of them.
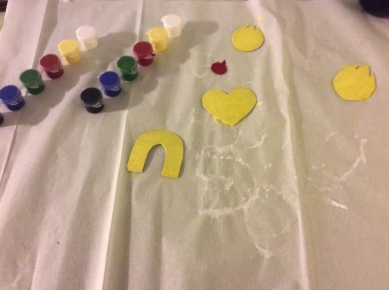
Some of the completed emblems. Golem Bomber’s is still in two pieces…
6. Glue together the add-ons
If any of your add-ons need to be stuck together, like Golem Bomber’s emblem or Brain Bomber’s eyepiece, now is the time to do that. Something like Elmer’s Glue is sufficient enough to get the job done. Here, you can see Golem Bomber’s completed forehead emblem:
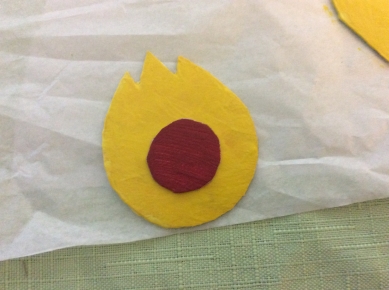
Using two pieces of mounting board offers greater contrast here.
7. Attach the add-ons
We’re finally at the last step! Using super glue, attach any cardboard pieces onto the bulb. Please be careful with this stuff. The name should be a giveaway, but super glue is stronger than other glue. It’s not as easy to clean up.
Here are some pictures of our completed bulbs, hanging on the tree we had last year:
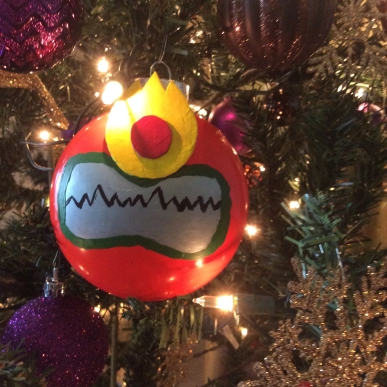
Golem Bomber.
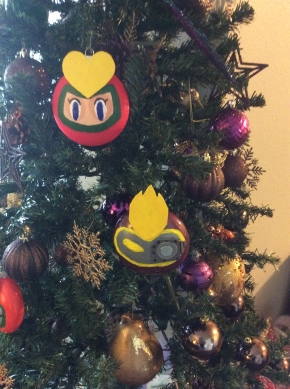
Pretty Bomber and Brain Bomber.
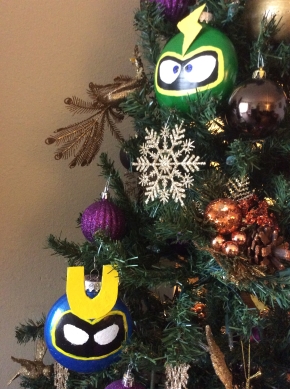
Magnet Bomber and Plasma Bomber.

A tree full of Bombermen!
If you’ve made any ornaments inspired by this tutorial, or even if you’ve got your own ideas of making Bomberman-themed ornaments, please share them with us! And please, share this article with your fellow Bomberfans. Thanks for reading.
